How to Unpack After Moving

Congratulations you moved!

Now that you’ve successfully completed moving day, it’s time to begin the unpacking process. Most likely, you start to unpack, but find yourself getting overwhelmed and your house getting cluttered. But don’t worry! Even if you have been putting off those boxes for months, it’s not too late to have the house you’ve always dreamed of.

Hopefully, you read our article on How to Move and therefore labeled all of your boxes, but if not, fear not, there is still hope. Just follow this step by step guide on how to unpack after a move.

house front door with keySTEP 1: ENVISION YOUR GOAL.

Make a list of all the rooms in your house, and write down all the large furniture items that will be stored in that room. It is essential that you designate a purpose for each room. Obviously, you should know where you want everything to go, before you unpack it. In order to do that, really quickly before you get started, take a minute to envision the house and the life you want. 

note pad deskSTEP 2: UNPACK THE ESSENTIALS FIRST.

Keep a checklist of essential items. The first night of unpacking at a new house can be so exciting that you can easily forget about some essential things you’ll need.  Do everyone a favor and make sure you have these things once it comes time to start unpacking.

  • Bathroom necessities: toilet paper, hand and body soap, and towels
  • Kitchen essentials: paper towels, cups, dishwashing supplies (in case you notice a spot on something when you’re unpacking)
  • Many Waste Baskets, one per room and bathroom

sofa w cat on it.jpgSTEP 3: START WITH THE BIG THINGS.

Bring in large household items like beds, tables, dressers, couches, and electronics as soon as they’re unloaded from the truck.  We recommend starting with these expensive items so you can give them the extra care and attention they need.

kitchenSTEP 4: GO ROOM BY ROOM.

In order to avoid becoming stressed out, and for time sake,completely unpack one room at a time. After all the big things have been situated in the right spot, it’s time for the smaller stuff. Most people lose focus when switching room to room, so try to finish one room before you start another.

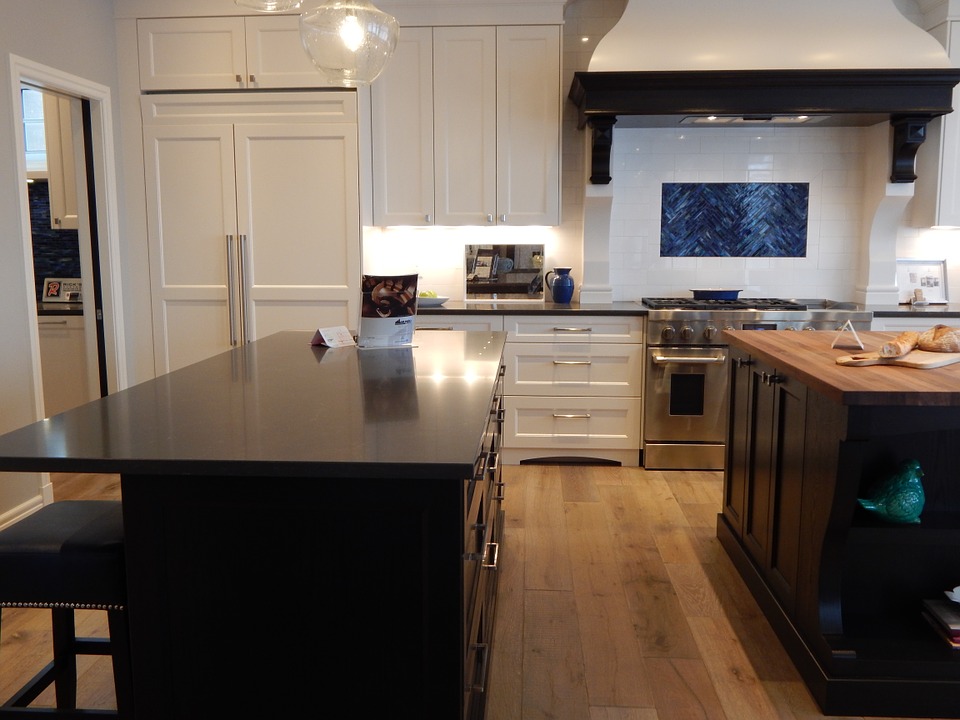
Need help picking a room? We recommend you start in the kitchen, however, it is possibly the most complicated room in the house. As for what you should unpack last, we say the garage and other storage places!


under bed storageSTEP 5: CREATE STORAGE OPTIONS

Don’t let the space under your bed go to waste, attach casters to a wooden box or wine crate and make your own Closet on Wheels.

Mounting a magnetic strip on the wall is a technique you can use in almost any area of the house. Let it hold your knives in the kitchen, or accessories in the bathroom, or art supplies in the craft area.


2016 Summer Bucket List

camp tent under stars

Summer is finally here! Don’t let it slip away without completing your summer bucket list. Here are some ideas to make your fun-packed carefree summer bucket list:

1. Go to the beach!

happy dogs at beach

If you don’t go to the beach at least once this summer, then you’re doing it all wrong!! Taking a surfing lesson, play a game of beach volleyball with strangers, go paddle boarding, build a sand castle, collect sea shells, or bring a book!

2. Camping anyone?

smores

Only one rule: there must be s’mores, a lot of s’mores.

3. Start a food fight.

hook food fight

Hook-style. And if you don’t know that reference, maybe take a summer day dedicated to Robin Williams movies, starting with Hook. You will not be disappointed.

4. Slip n slide!!

19631654358_7de87833b4_o (1)

Water-fueled sliding apparatus’ are essential to summer. Even if it usually ends with somebody hurt….

5. Tie-dye everything.

Tie_dye_T-shirts

Ensure back to school shopping by ruining your clothes.

6. Watch a thunderstorm.

rainy street

Enjoy the rain. See if you can get a cool picture or time-lapse of lightning!

7. Jump off the high dive at the local pool.

high dive

It’s only scary the first time!

8. Play chess.

chess

Or if you don’t know how to play, then take a day to learn. Then play a chess game at the park!

How to Pack for a Move

Before you start packing to move, you’ll want to get organized. Moving houses can be stressful, but it doesn’t have to be! Follow these professional tips for packing your next move.

#1 What you’ll need:

A notebook to stay organized and keep track of the contents of your moving boxes. Keep it with you at all times.

Boxes in a variety of sizes and a clear plastic bin.

#2  All About that Box:

– label each box with a number, and write down the contents of the box in your notebook. This will seriously help when it’s time to unpack.

– Put heavier items in small boxes (you want to be able to lift the box so don’t go over 30 pounds)

– Put heavier items on the bottom of boxes and lighter items on top. Load heavier items into moving truck first.

– Fill empty spaces with clothing, towels, linens, and other soft materials.

#3 Hey! Be Careful With That!

– Wrap your fragle items in packing paper or bubble wrap (or in clothes to save money)

#4 Tape Everything:

– Securely tape boxes with extra protection around the box’s top and bottom edges

#5 Think Ahead:

– Disassemble large furniture

– Bring an overnight bag with the essentials: toiletries and a change of clothes

– Pack things you’ll need right away in the plastic tub like: paper towels, toilet paper, cords, chargers, snacks, eating utensils, towels, pet food, and tools

Another Video

We have been hard at work with these videos and we have a good amount of them now. Last time, we sent out our main video, but today we are posting a shorter video that does a good job illustrating our services even more. So, without further adieu, here is our latest video.


3 Tips To Make Small Spaces Count

When it comes to making your space count, figuring out how to position your belongings can be a major factor in getting the most out of your space. We have been working on ways to make everything fit in tight quarters or just ways to open up your rooms. Here are the top three things you can do to make your space matter.

  • Storage on Storage on Storage: What do we mean by this? Well, implementing furniture that can act as storage will keep your rooms clutter free while also adding a little stylistic flair. For example, using a repurposed chest as a coffee table can give your living room a rustic feel that can double as additional storage space. You could also get end tables to go on the sides of your couch or behind it to give your room a modern feel to it. Finding ways to make your furniture work double will be a great way to open up your space.
  • Shelves: Shelves can do a lot to make room in your home. A good solution is wall hanging shelves. This makes it so you have ample shelving space, but with out the bulk of a proper cabinet or bureau. With additional shelving in tight spots, you can make your house very modern without breaking the bank or cluttering your home.
  • Furniture placement: If you have furniture that you want in your room, you’ll want to find ways to pair it up with the others. End tables in our first tip are good examples of this, but making the idea work best requires creative thinking. You could take a long table and put it against the back of a couch. Using design sensibilities will go a long way, but, let’s say, you have a long thing table that doesn’t really fit anywhere at the moment. You could take that same table and position your couch to have its back face an open area. Put the table behind the couch and you now have a chic appeal, that doubles as additional storage for books and pictures.

With these tips you can find ways to make your small spaces seem bigger, or your big spaces seem more modern. It all comes down to presentation and personal taste, but with the right kind of mindset, you will be able to reinvent your room and get the most out of the space you have.

Cinco De Mayo

Cinco De Mayo is tomorrow and with it comes a large celebration that we here in Tucson are very familiar with. A lot of people have parties and what not, and this happens all across America, but what is the reason why we celebrate? Well, we decided to look more into the holiday and found some interesting fact that you may or may not have known about Cinco De Mayo.

For starters, the often mistake made is that Cinco De Mayo is a celebration for Mexico’s independence. It is not. That holiday is a very huge celebration that takes place in September. Cinco De Mayo is to commemorate the Mexican army’s unlikely victory over the French. It often gets misconstrued as the independence day, partially because it was such a monumental battle, but it is a completely different event altogether.

Still, there is a big celebration every year by both Mexicans and Americans and it has become somewhat of a big party holiday in the way that the 4th of July has become a big BBQ holiday. Since Tucson is so close to Mexico, the celebrations are oftentimes elaborate and festive, making it a great time of the year to be in Tucson. But we Don’t have to tell you that.

So for tomorrow, be sure to have fun and be safe, all while thinking about that unlikely victory at the battle of Puebla. Most importantly, be sure to stay safe out there. Happy Cinco De Mayo everyone.

Kitchen Challenge

For our fourth and final blog in the Spring cleaning series, we have decided to talk about the Kitchen by implementing a cool and interesting cleaning “game” we have recently found out. We encourage anyone reading to try this method out and post their experiences in the comment section or by reaching out to us on social media. In an attempt to bring the best tips to you, we would definitely like to hear from you about your experiences. Enough of that, though, you’re here for the tips themselves, so we’ll get to it. Here’s the 30-day kitchen challenge.


Challenge Your Kitchen For Thirty days:


The challenge is simple enough. Get a box, a big box, and put it down right on the counter. You want it accessible and sort of in the way to promote actively thinking about your challenge. Now, with the box set-up, put all of your kitchen tools and utensils in the box. Your kitchen will be bare, but everything will be in this box so you’ll know where it is. Here’s how the challenge goes:


  1. Whenever you need something, go to the box and use it. When your done, the item is deemed useful so you can put it back in its proper spot.
  2. Repeat this process over the 30-day period
  3. Anything that doesn’t get used will be left in the box. If there are things in the box after 30 days, then it is safe to say you do not really need them cluttering up your kitchen space.
  4. Donate the box because, although you may not need what is leftover, someone else might need those exact items for their own kitchen.
  5. Enjoy the fruits of the challenge by beholding a clean and organized kitchen where everything in it is 100% useful.


Try this out for the month of May and get back to us on how it went. We know all to well how cleaning can be tedious, but by using this little challenge as a game for organization, you might find yourself enjoying the process and the outcome. 30-days may seem like a long time, but as the days go by you will notice your kitchen becoming less cluttered and more useful and that can only mean good things for you. As always, we strive to bring you the tips and advice you need to make your moving, storage and spring-cleaning process seem less of a struggle. We’re going to be trying out some new things on our blog in the upcoming weeks, but for now we hope you enjoyed the month long spring-cleaning series.

You and Your Yard Sale

It’s week three and we’re talking Yard Sales. Yes, yard sales. A simple enough concept, but how you put your yard sale on really matters. There are many benefits to putting on a yard sale, ones that bring a unique attribute to any move, but the main reason for having one is to get some money for belongings that are taking up too much space. We decided, then, to drop some useful tips on how to make your yard sale the most successful one on the block.


Three Tips For A Successful Yard Sale:


  1. Organization will lead to purchases: We’ve all seen the yard sale on the street that has everything lumped around. Most people don’t want to rummage through a bunch of stuff on the off-chance that they will find exactly what they are looking for. By organizing your areas ( we recommend using collapsible tables) in a similar way to a retail store, people coming through can browse much easier thus increasing the chance of more purchases.
  2. Know what you have: If we are being honest, don’t put out things that are broken. If you want to make some money, the working stuff that are complete will fetch a far better sum than the broken stuff you charge for fifty cents. Make sure things are as complete as possible before you put them out.
  3. Do a group Yard Sale: Yes, a group yard sale might sound tedious, but by having a greater variety of things available, you are bound to attract far more people than if you had done it solo. Make sure each group joining in to the yard sale knows how to identify what they are putting out. We suggest using color-coding for various items (Example: You label your stuff with blue tags, I would do yellow, while Tim and Sara from across the street do red).


It isn’t an exact science, having a successful yard sale, but the better presentation will always win in my book. It all comes down to foot traffic so if you pick a good day and follow these tips, you can maximize the potential of your yard sale. We really like yard sales for the simplicity of it and, with a little extra work, there can be a great pay-off with your moving and storage finances and the organization of your house.

5 Tips for Your Garage

Following our trend from last week, we are bringing the latest in our spring-cleaning series. Last week we tackled going through your bedrooms and decluttering that space and this week we have a much bigger project in mind. Oftentimes, closets and garages gather up a lot of unused or unwanted things. That extra space lends itself well to a set it and forget it mentality. With spring-cleaning we thought we would give a rundown on how to approach these two areas with these 5 easy tips. Check em’ out.


Clearing Out The Garage or Home Storage Spaces:


  1. Examine The Area: With that first glance, try to make a mental map of what is there and when the last time you used it was. Once you have this information, you will be able to discern what things are staying and what things are going.
  2. Pick A Spot and Go: It’s important to not get overwhelmed with your garage size, or the extra storage space you are cleaning out. Do the area in small increments to avoid this burden. Find that first doable spot and get right to it without moving on to the next before it’s done.
  3. Organize: While you’re going through, review the mental map you made. If you come across and old, let’s say, CD player you haven’t used in years ask yourself this simple question: “Do I really need this still?” if the answer is no, then put it in the throwing out pile (see last week’s blog post about pile making). You’re going to have to be a little brutal with your decision-making, but the benefits of a cleared up space will be tremendous.
  4. Donate: This is something we are going to mention often. Things that you don’t use or need anymore can have a second life. Rather than throw it out, consider, if you will, the possibility that item might have on someone else. Sure, you aren’t using that CD player anymore, but someone might need that exact thing for his or her own enjoyments.
  5. Implement New Organization: What better time to further your organization than after a big clean? With the new space, you’ll be ready to implement some new shelving units or containers to keep your stuff in line for a more organized garage or storage space.


And there you have it. These 5 easy to follow tips will help you on your way to a more organized home space. Keep in mind there are always things you can do to make this process easier. These tips cover the broad strokes, but you also know what kind of process works best with you. Feel free to mix and match these tips with your own cleaning philosophies to ensure the best experience possible. Check back next week for the next installment.